
There are some requests that will make any wiring tech groan. “Guys, can you make up some 6m twisted and shrunk cable assemblies?”
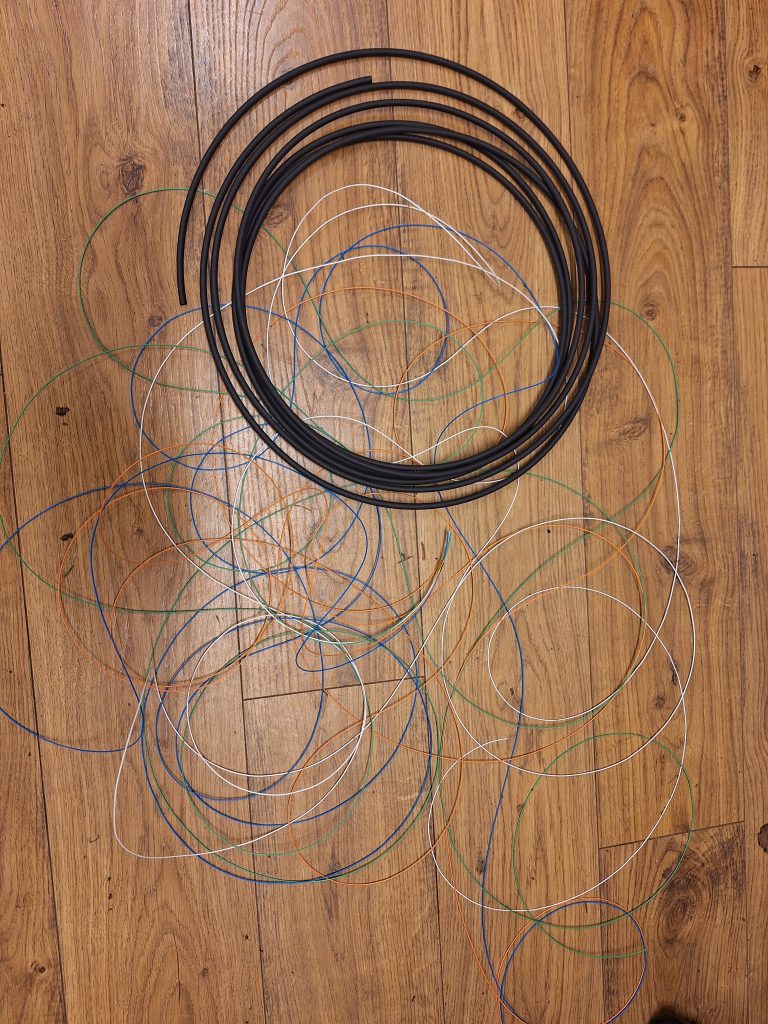
Firstly, twisting long lengths of single cores into a bundle can be a tricky job in the workshop as the wires very quickly become a tangle as you are trying to even the tails out.
Secondly, getting that long twisted bundle into a closely fitting size of heatshrink… Well, I’ve seen loads of techniques but whichever you choose it is usually a pain.
This tech tip is a quick and dirty technique to help you with both issues but it breaks one of the golden rules of pro-wiring.
“You should never use a drill to twist wires together”
This is usually excellent advice; a drill twisted assembly can put extra stress on the internal conductor strands, potentially compromise the internal structure of the wire through excessive twisting and typically the end assembly will just try to unravel.
However, with a bit of care and a few choice techniques we can minimise the problems and leverage the speed advantage of the quick and dirty drill technique!
Our customer request;
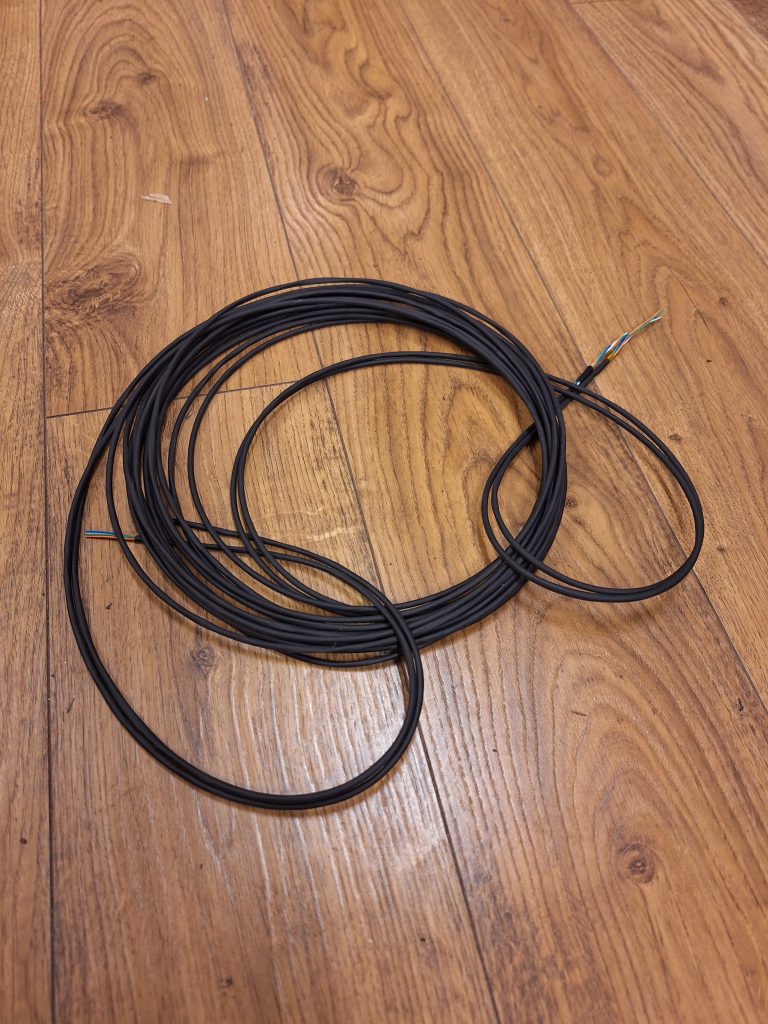
2x 6m long, #24 Type 55A, four core, twisted and heat shrunk.
The twisting is a pain but feeding a four core twisted bundle inside a length of heat shrink is a task that many of us have struggled with and lost plenty of time.
BEFORE YOU START YOU WILL NEED
- Small drill with speed control
- Bench vice
- A movable stand or table
- Kapton Tape (Polyamide tape)
- Painters tape
- A workspace at least twice the length of your final twisted bundle.
Cut your wires at least 10% longer than your final required length, the twisting process will consume some of this length and there is inevitably some end damage due to clamping. So allow a few hundred millimetres extra that can be snipped away at the end of the process.
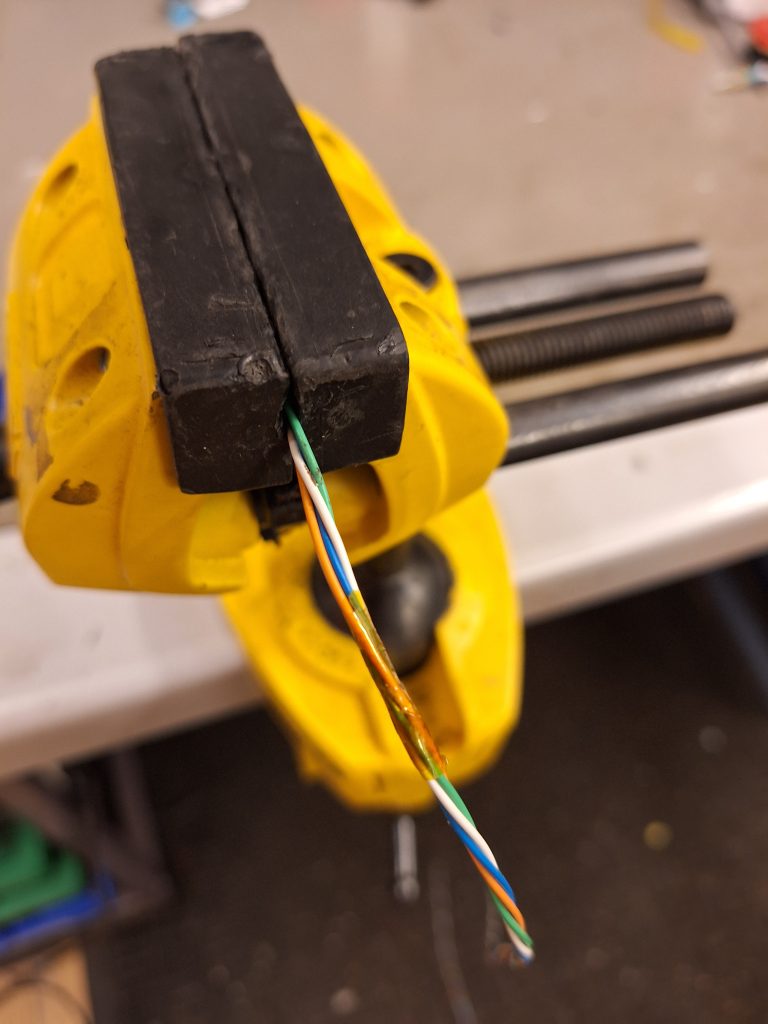
- Bundle your wires together at one end and wrap with Kapton tape and hold this securely in a small bench vice.

- Even out the rest of the wires length, feed them through your hand to ensure that they lay evenly and are of the same length. Wrap this tail end using Kapton tape.
- You now have four untwisted wires, all of the same length, evenly laid out and Kapton taped at both ends, with the fore end captured in a bench vice.
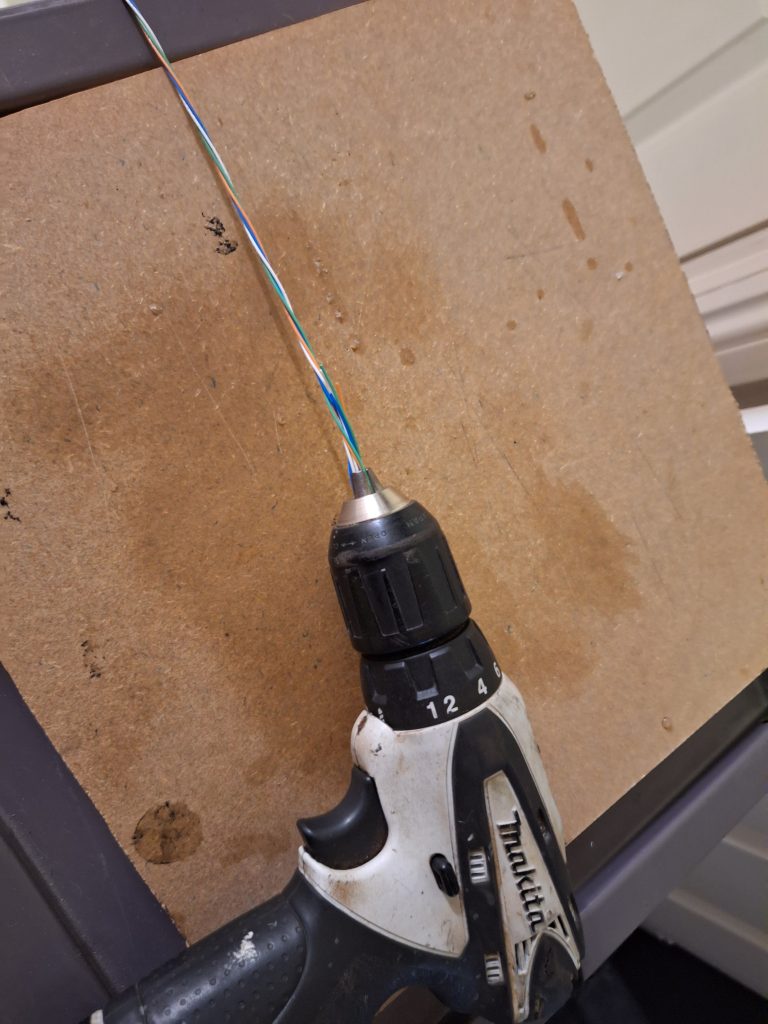
- Insert the wires into the drill chuck and tighten down firmly. Apply a gentle tension to the wires and start the drill’s rotation but go gently.
- We want one twist every 20mm to 30mm. We do not want to over twist but equally to light a twist will be too loose and very hard to over sleeve.
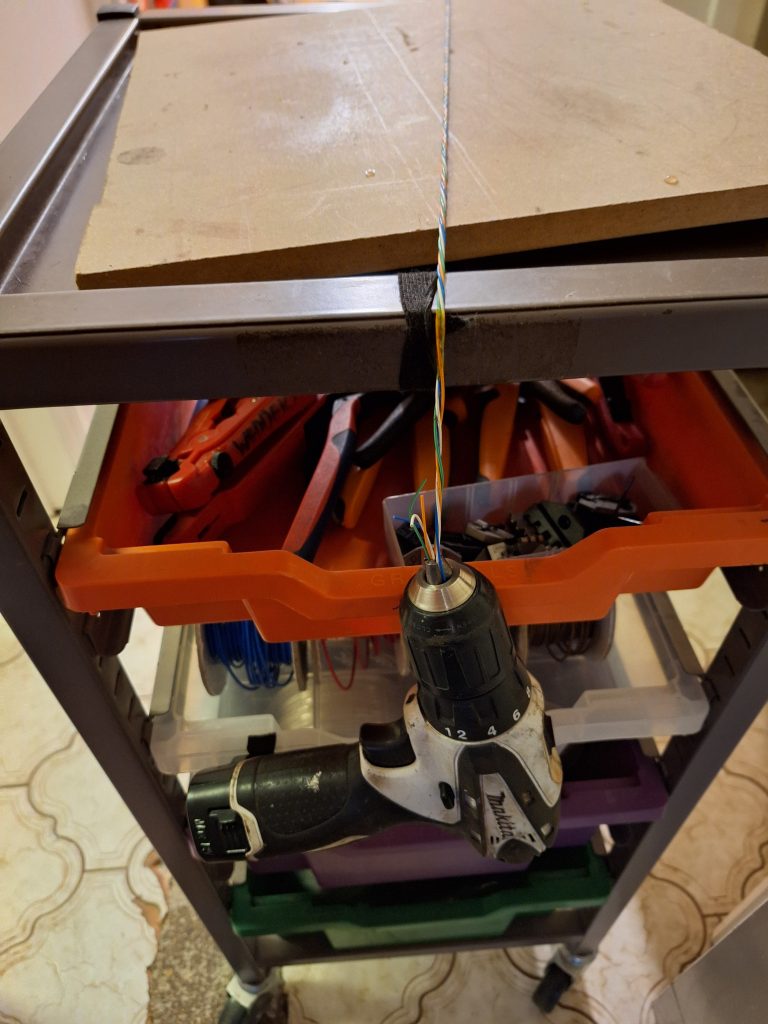
- Once you have finished doing your drill twisting, have your stand ready so that you can drape the drill over it, the drills weight will maintain a small amount of tension along the twisted wires.
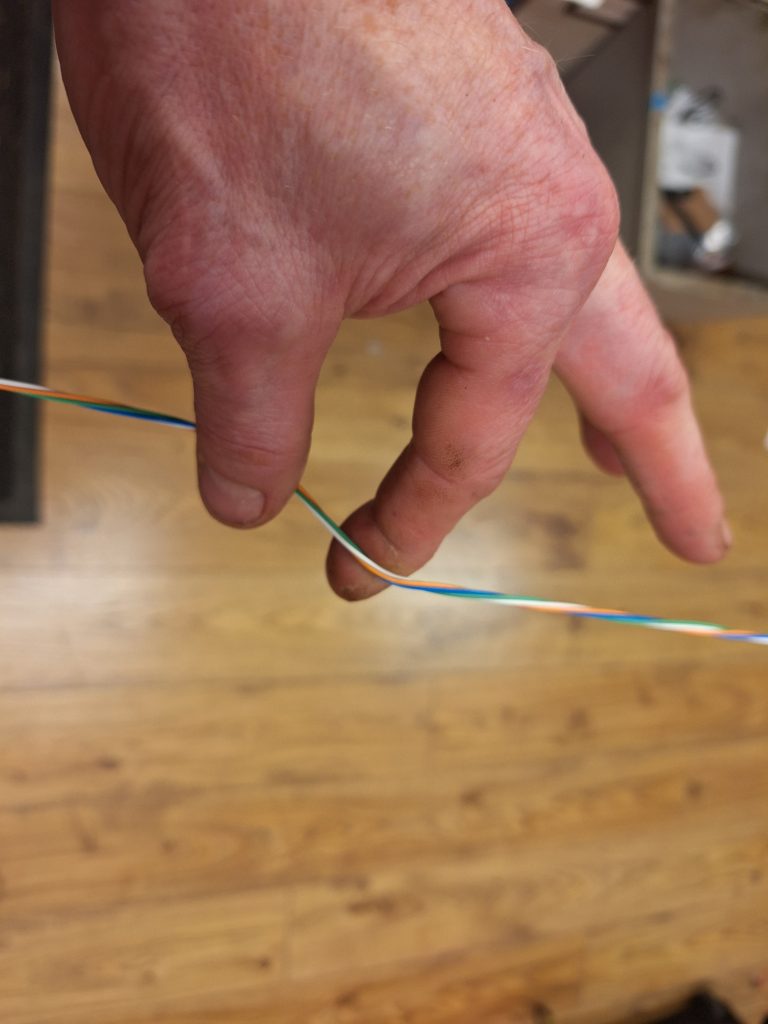
- The twisting process adds quite a bit of spring to the individual cores.
- Use your fingers either side of the wires, push them into a gentle kink and run it up and down the whole twisted length. This action helps redistribute the stress in the wires and tends to set the wires into a straighter bundle.
- Now wrap small amounts of Kapton tape periodically along the twisted length, one metre intervals is typically sufficient. And only apply one or two wraps of kapton at each point.
- After this you can release the assembly from both ends.
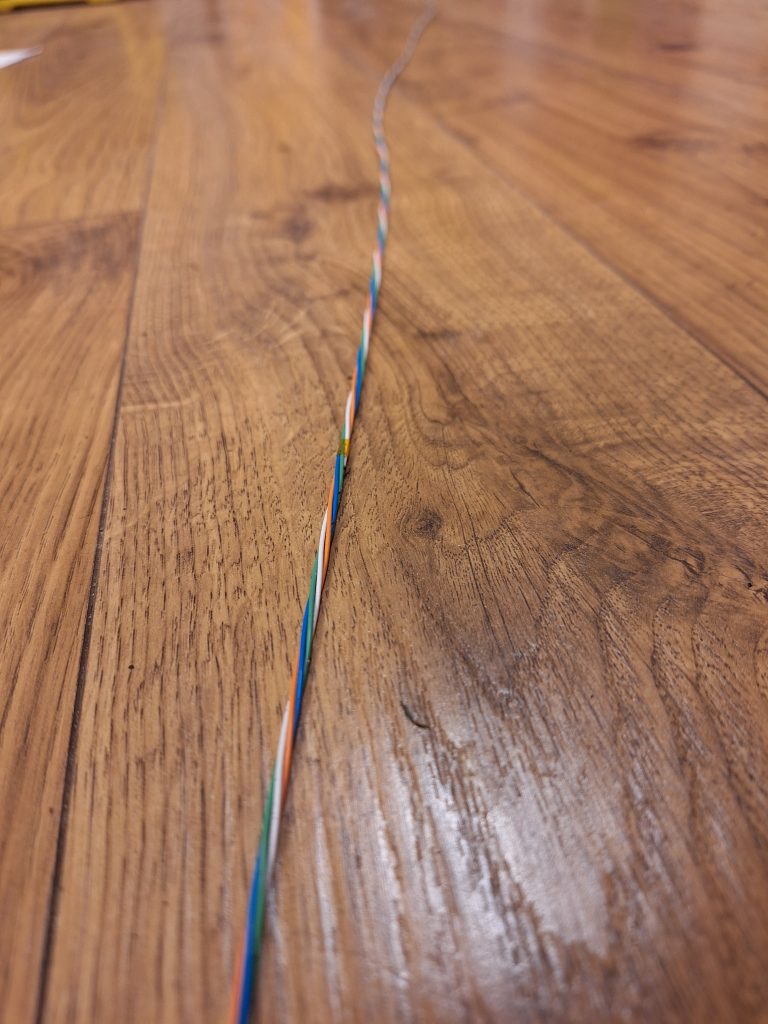
- The wire bundle will always untwist to some degree however your small kapton tape points and the wire stress relieving should have minimised this and it should lay reasonably flat and straight upon the floor.
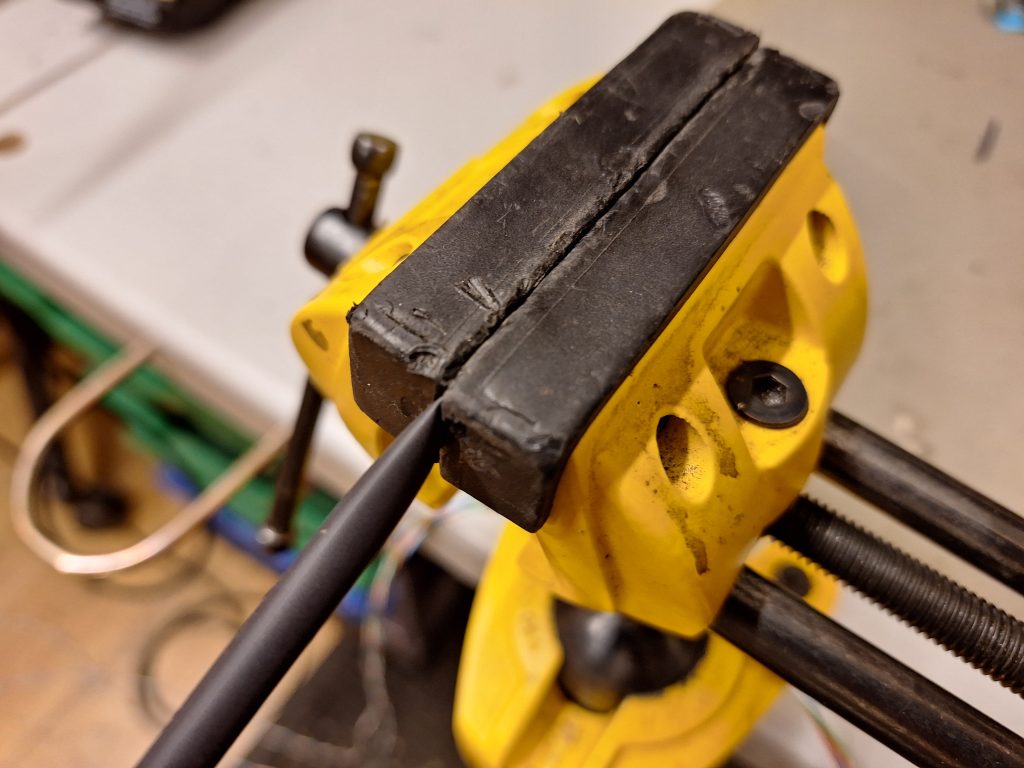
- Take your length of pre-cut heatshrink, clamp one end into your bench vice.
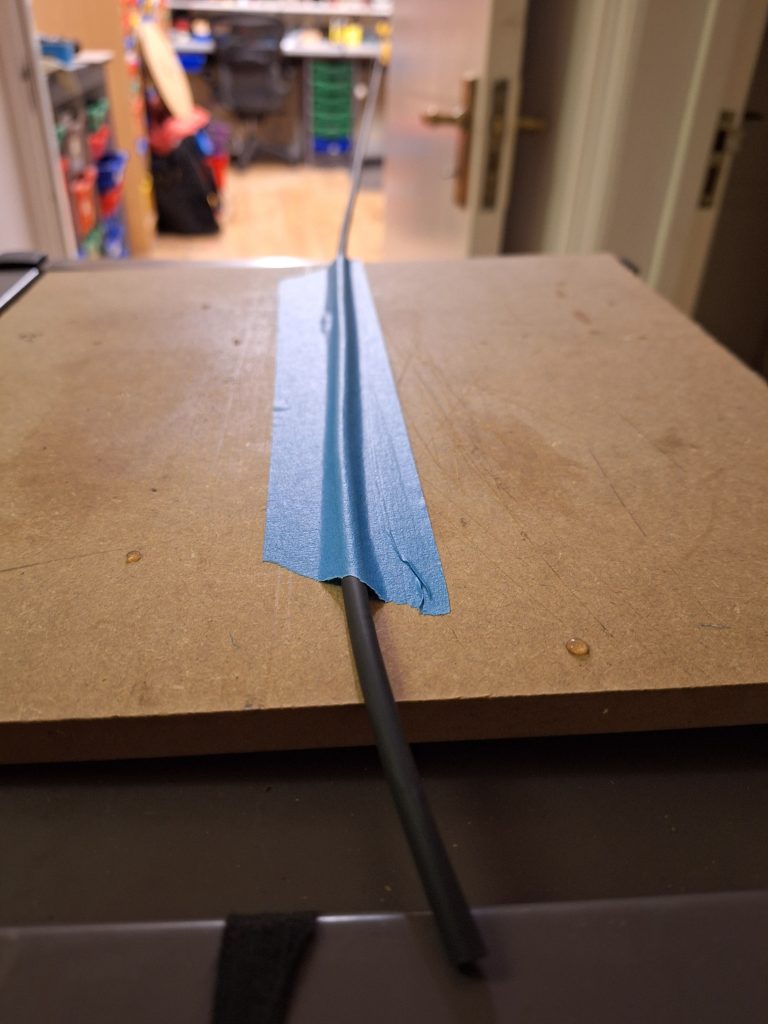
- Drape the sleeving back to your stand. On top of your stand, use painters tape to hold onto the tail of the heatshrink. Do this in such a way that the heat shrink is not crushed, this can take a little practice. We can now move the stand such that the heatshrink is now straight, in gentle tension and without kinks.
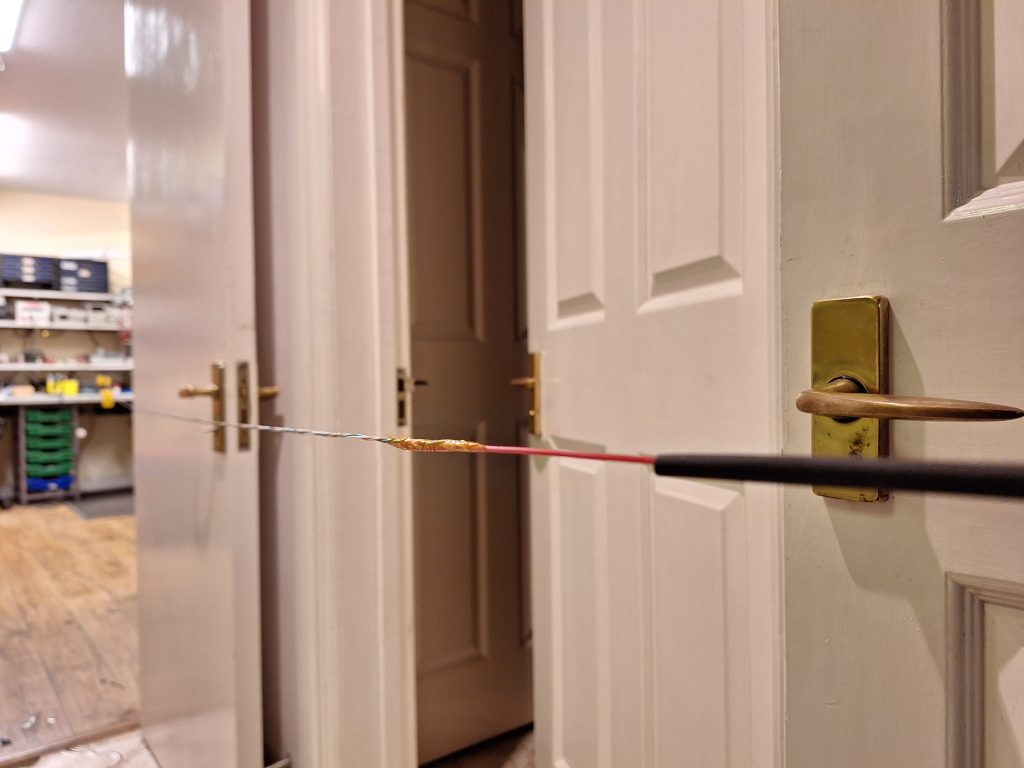
- Take a medium gauge wire, #20 gauge works well. Feed this single wire into the Tail end of the heatshrink. Ensure that the tip of the wire is a clean cut and without a sharp edge that may snag on the inside of the heat shrink.
- Push the single wire all the way up the heat shrink until it gets to the clamped fore end. Unclamp the heatshrink and wiggle the single core until it is completely threaded through the heat shrink.
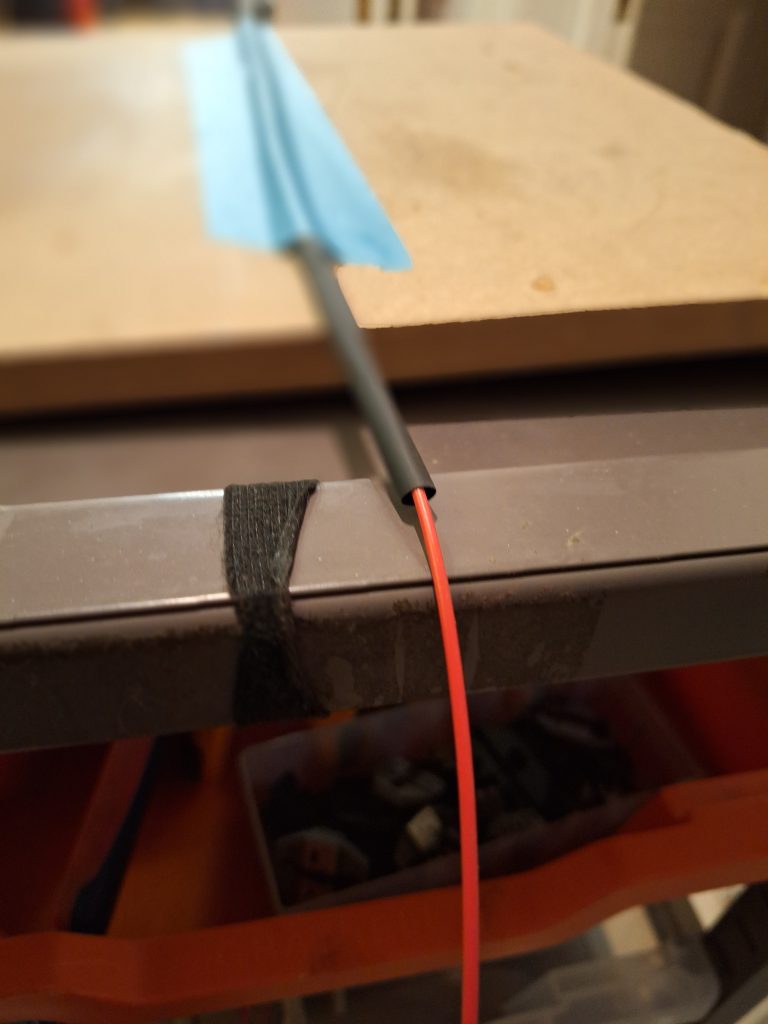
- Remove the heatshrink tail end from the painters tape but do not cut the tail end of the single wire from its reel of wire.
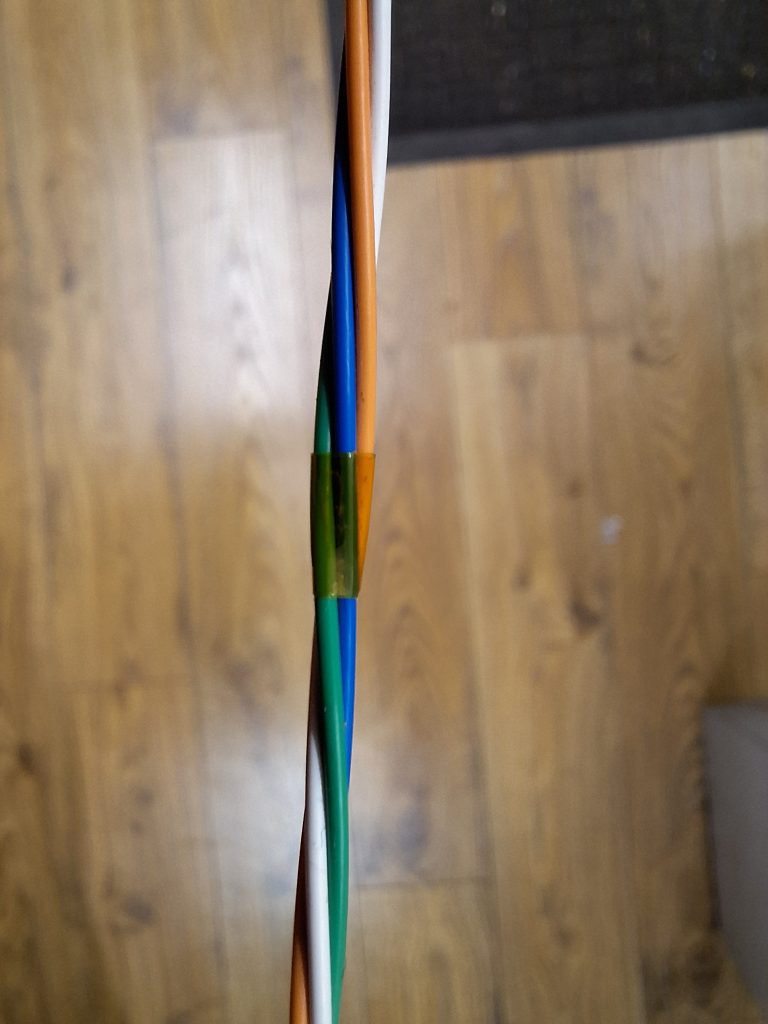
- Take the fore end of the single conductor and overlap it longitudinally with the tail end of your previously twisted bundle. About 150-200mm of overlap is sufficient and then apply a single layer of Kapton tape wrapped along the whole join.
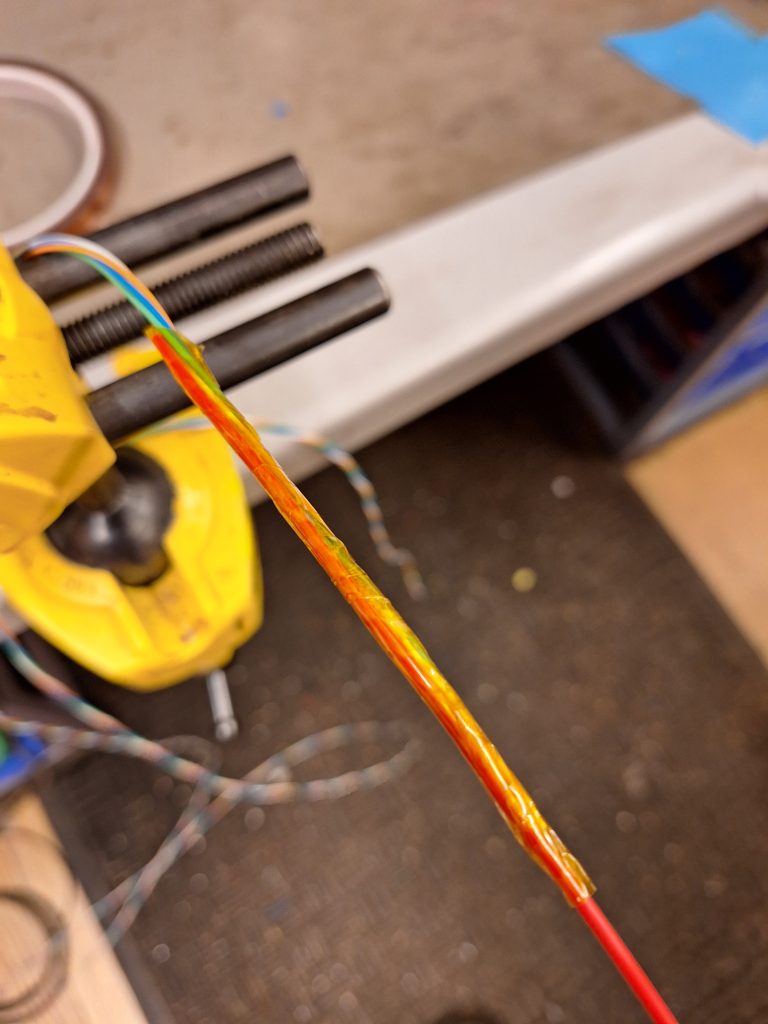
- We are trying to achieve a good strong grip between the bundle and the single core but without excessively increasing the joints diameter.
- Test the strength of this joint, if it fails during the next stage you will have to start over.
- Whilst folding wires back against each other can create a very strong joint, it also significantly increases the joint diameter. This is often too much to pull the joint through the heatshrink.
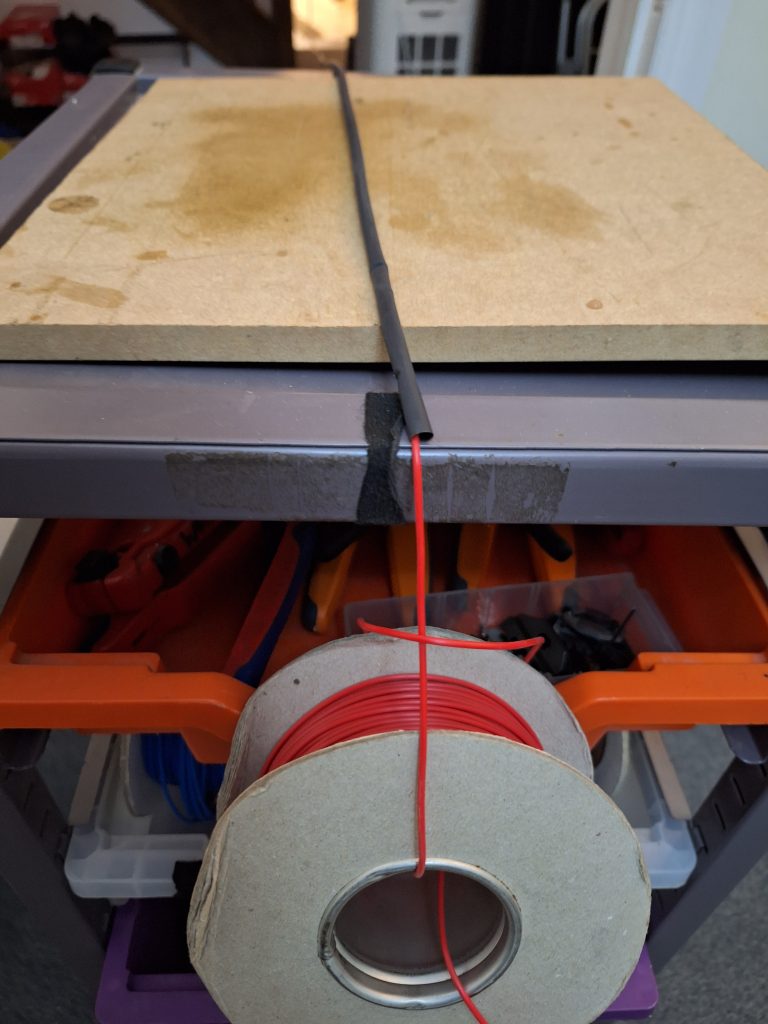
- For this next stage you need a work space twice the length of your finished cable. Clamp the Fore end of the twisted bundle in your bench vice and then layout in a straight line the rest of your bundle/join/heatshrink workpiece.
- Move your stand to the furthest workshop point, Tie off the tail end of the single wire to its reel so that the reel will not unwind. Drape the reel over the stand. Adjust the stand so that the dead weight of the wire reel applies a light tension to the whole bundle/join/heatshrink workpiece. You may want to add a more weight to the reel to achieve a sensible tension but avoid overloading the middle join!
- Move to the middle of your tensioned assembly. The heatshrink should float easily over its single wire. Try to ease the heat shrink over the join, if this is difficult you will need to reduce the join’s overall diameter or increase the heatshrink diameter, else you will struggle greatly with the next stage.
- Assuming you can reasonably slide the heat shrink over the join continue the process and completely slide the heat shrink over the multi-core twisted section.

- You can now shrink the heatshrink onto your multi-core bundle, remove and trim.
- The result is a six metre length of cable is a six metre four core bundle that has been twisted and shrunk in a relatively short time and relatively painlessly.
Whilst this technique does use drill twisting, which we all know is not ideal, the method is certainly a good work-around for this common but often very time-consuming task.
Happy wiring. J.